Getting Started With GMS Cloud
Now that you have signed up for GMS Cloud, you will have been redirected to the domain provisioning page. Here you have two choices: you can either validate or your own organisation’s domain, or you can use a sub-domain from within GMS Cloud.
If you choose a sub-domain, you can still validate your own personal domain at a later date from within the GMS Admin interface. However, if you want to use your own domain, it is recommended that you do this now.
Domain Validation
Following the purchase of the GMS Cloud, the first time you launch the application, you will be asked to validate your domain.
When you sign your business up for GMS Cloud, you provide the domain name you want to use with the service. This is the unique name that appears after the @ sign in your company email address and after www. in your web site address. Before your organisation can use GMS Cloud with your company’s domain, you’ll need to verify that you own it. This ensures that no one else can use services or send email that appears to come from your company.
The domain validation process is also designed to ensure that the domain you desire to use is not already in use on the GMS Cloud server. You can verify your domain in any of several ways, depending on which is most convenient. To do this, you’ll need to update either your domain’s DNS settings or files on your domain’s web server.
- MX Record
- HTTP upload
- Sub Domain of gms-cloud.com
“MX Record†& “HTTP Upload†will both allow you to use your own domain name, the processes are different in each instance however. We will cover this in the following sections.
“Sub Domain†is available also. This option will configure a subdomain of gms-cloud.com with your company domain name appended. An example of what your email address may look like with this option is Fran@myshop.gms-cloud.com. If this option is used, you can change this to reflect just your company name at a later stage. We will cover this later in the guide under the “Editing Domains†section located under the “Domains and Users†section.
MX Record
Using this option, you will need to update your MX (Mail eXchanger) record to reflect the destination of the mail that will be sent to you and your users. This can usually be achieved by accessing your ISP’s cPanel preferences on their website, via your account. Typically the format you will need will be like this: yourdomain (including .com or equivalent) IN MX mail.gms-cloud.com
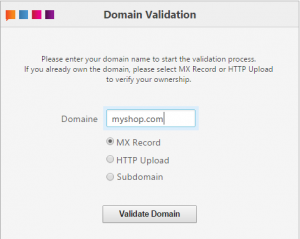
You can find out what you will need to be entered on the ISP’s cPanel using the domain validation tool. To begin, type your company domain name and select “MX Record†as shown in the below screenshot.
From here, click on “Validate Domainâ€. At this point, you should see something that looks similar to the below.
You will need to add or edit your MX record in order to reflect what is shown here. Once you have done this, click on “Verify MXâ€. The system will then check that the correct MX record is in place and providing that this is successful, your domain will then be provisioned and you will then be taken to your account on the GMS Cloud system.
HTTP Upload
Uploading an HTML file to your domain web server is one way to verify domain ownership and provision GMS Cloud for your domain. This requires that you have access to the server and can upload files to it.
The advantage of using the HTTP upload method, is that you can trial the service without the mail arriving to your users/domain. Use this option to test the service without changing your current email routing.
Note: Please be aware that you will still need to make changes to your MX record as described in the previous section regarding “MX Record†if you choose to have your mail delivered to GMS Cloud.
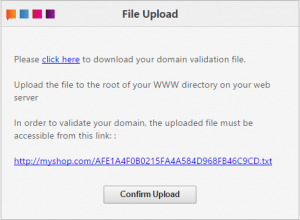
To use this option, type your domain into the domain validation tool, select the “HTTP upload†option and then click on “Validate Domainâ€. At this point, you will see something similar to the below screenshot:
From here, click where it says “Click Here†to download a file that you will need to subsequently upload to your domain web server. The web address shown at the bottom is where you will need to make this file available to view. Once you have confirmed that the file is accessible from the internet, click “Confirm Uploadâ€. Your new GMS Cloud domain should then be provisioned and you will then be taken to your account on the GMS Cloud Email system.
Subdomain
As explained previously – This option will configure a subdomain of GMS Cloud with your company domain name appended. An example of what your email address may look like with this option is Fran@myshop.gms-cloud.com
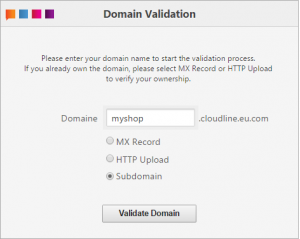
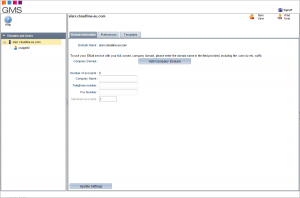
To use this option, simply type your company name or domain name without the “.comâ€, “.co.ukâ€, “.net†etc. and click on “Validate Domainâ€. You will then be taken to your account on the GMS Cloud Email system.


