Introduction
This guide is for administrators of the GMS Cloud Email service. The information contained herein will describe the roles and features of each section within the administration interface.
This guide assumes that you’ve purchased or signed up for a trial of GMS Cloud and you’re ready to start using your new service. Once you’ve signed up for GMS Cloud, you will be redirected to a page to set up your domain, which is covered in the next section of the document.
The account created when signing up for GMS Cloud is ONLY used to administer the service (it is not your new email account). This account does not count as a licensed seat (you will not be charged for it). Therefore, the first thing you need to do after purchase is create yourself an email account to use, along with the other user accounts you require. You can access the administration interface login screen from the link below: https://mail.gms-cloud.com:8443/login.mml
Your access to GMS Cloud, after initial setup, is at:Â https://mail.gms-cloud.com – This is where you and your users will login using the usernames and passwords created in the application admin interface.
You can view your purchase history by going to the dashboard
Domain Validation
Following the purchase of the GMS Cloud, the first time you launch the application, you will be asked to validate your domain.

When you sign your business up for GMS Cloud, you provide the domain name you want to use with the service. This is the unique name that appears after the @ sign in your company email address and after www. in your web site address. Before your organisation can use GMS Cloud with your company’s domain, you’ll need to verify that you own it. This ensures that no one else can use services or send email that appears to come from your company.
The domain validation process is also designed to ensure that the domain you desire to use is not already in use on the GMS Cloud server. You can verify your domain in any of several ways, depending on which is most convenient. To do this, you’ll need to update either your domain’s DNS settings or files on your domain’s web server.
- MX Record
- HTTP upload
- Sub Domain of cloud.eu.com
“MX Record†& “HTTP Upload†will both allow you to use your own domain name, the processes are different in each instance however. We will cover this in the following sections.
“Sub Domain†is available also. This option will configure a subdomain of gms-cloud.com with your company domain name appended. An example of what your email address may look like with this option is kovacs@myshop.gms-cloud.com If this option is used, you can change this to reflect just your company name at a later stage. We will cover this later in the guide under the “Editing Domains†section located under the “Domains and Users†section.
MX Record
Using this option, you will need to update your MX (Mail eXchanger) record to reflect the destination of the mail that will be sent to you and your users. This can usually be achieved by accessing your ISP’s cPanel preferences on their website, via your account.
You can find out what you will need to be entered on the ISP’s cPanel using the domain validation tool. To begin, type your company domain name and select “MX Record†as shown in the below screenshot.

From here, click on “Validate Domainâ€. At this point, you should see something that looks similar to the below.

You will need to add or edit your MX record in order to reflect what is shown here. Once you have done this, click on “Verify MXâ€. The system will then check that the correct MX record is in place and providing that this is successful, your domain will then be provisioned and you will then be taken to your account on the GMS Cloud system.
HTTP Upload
Uploading an HTML file to your domain web server is one way to verify domain ownership and provision GMS Cloud for your domain. This requires that you have access to the server and can upload files to it.
The advantage of using the HTTP upload method, is that you can trial the service without the mail arriving to your users/domain. Use this option to test the service without changing your current email routing.
Note: Please be aware that you will still need to make changes to your MX record as described in the previous section regarding “MX Record†if you choose to have your mail delivered to GMS Cloud.
To use this option, type your domain into the domain validation tool, select the “HTTP upload†optionf and then click on “Validate Domainâ€. At this point, you will see something similar to the below screenshot:

From here, click where it says “Click Here†to download a file that you will need to subsequently upload to your domain web server. The web address shown at the bottom is where you will need to make this file available to view. Once you have confirmed that the file is accessible from the internet, click “Confirm Uploadâ€. Your new GMS Cloud domain should then be provisioned and you will then be taken to your account on the GMS Cloud Email system.
Subdomain
As explained previously – This option will configure a subdomain of GMS Cloud with your company domain name appended. An example of what your email address may look like with this option is  kovacs@myshop.gms-cloud.com
To use this option, simply type your company name or domain name without the “.comâ€, “.co.ukâ€, “.net†etc. and click on “Validate Domainâ€. You will then be taken to the admin UI interface for your GMS Cloud account.

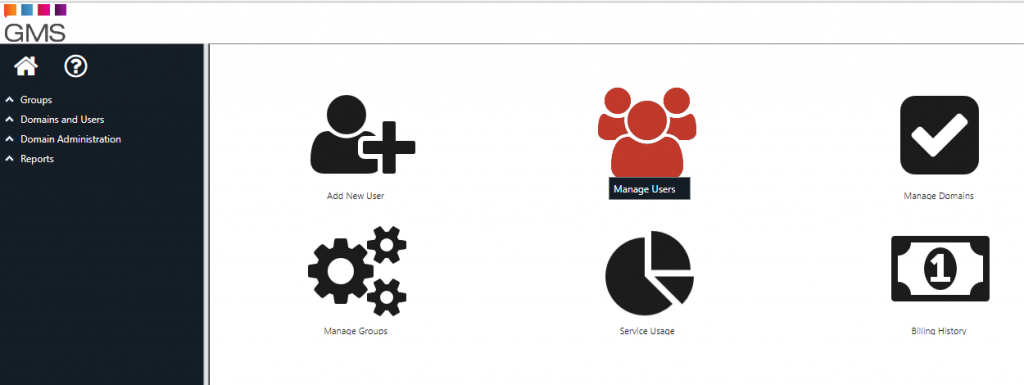
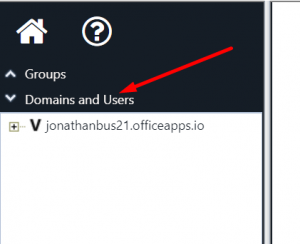
Domains and users section
Adding Users
Adding users is easy. First select your domain, then click on the “New Userâ€. From here, you will be given options to add users.
Add single account
User – Enter a name for the account that you want to set up
Password – Enter the password to be used for this account, the user may change the password to one of their own choosing at a later date. Passwords should not terminate with the character “*”.
Confirm Password – Enter the password again to confirm that It has been entered correctly
Profile for each new account
Select the profile you wish to be applied to the new accounts you create, this profile will often be the same for all users, but if, for example, you have purchased X number of total GMS Cloud and Y number of Office seats to use with the service (i.e.: where Y is less than X), then the option will be available to select what feature access the new user will be granted. In this example the profile “GMS Office” is appropriate: 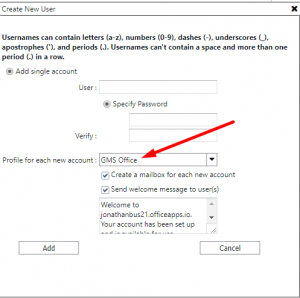
Create a mailbox for each new account
Selected by default this option will automatically enable and create a mailbox for each account entered above. If you elect to not create a mailbox then you should ensure that you set one of the other available options such as Autoresponse, Forward, etc. as an account should never be left without an action.
Send Welcome message to User(s)
If this option is selected then you can enter a welcome message that will be sent to all new users created.
Once the list of accounts has been entered, either by the “many accounts†or “single account†options click on the Add button to enter them in to the system.
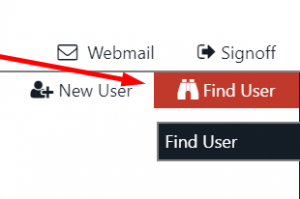
Find User
You can use this option to find any accounts (user, forward, auto responder, etc.) that have been set up in GMS Cloud. It can be used to check that a proposed account name is not already in use, for instance. It would also be used to select an account for editing. Wild-cards * and ? can be used to find partial matches.
Enter the account name (including any wild-cards) that you want to find in the ‘Search for’ box and click on the Find button. A list of accounts that match the search string will be displayed or an error message if none match the input.
Editing Domains
Domain Information (Domains & Users)
Select the domain to edit from the listing shown in the main window, the resulting page displayed will differ depending on the type of domain selected. You can amend all details concerning the domain from here.
Upon selecting a domain, you’ll see options to edit the following
Company Name
Telephone Number
Fax Number
Upgrading/Changing to a full domain
If you’re using a subdomain of gms-cloud.com, you will see that under the Domain Information Section, you will also find a button which allows you to switch over to your own company domain, this is labelled “Add Company Domainâ€. Clicking this will launch a small window which is similar to what you would have seen whilst validating your domain. Here you will be able to use the “MX Record†or “HTTP Options†options to validate your full company domain.
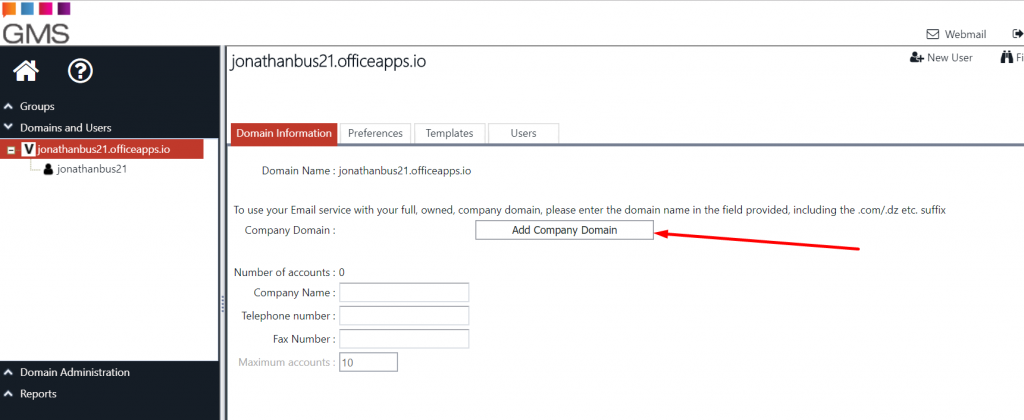
For more information on this, please refer to the “Domain Validation†section of this guide which can be located near the start of the document.
Preferences
Unknown User Action – When an email message is received for an unknown user account GMS can be configured to take one of the following actions.
- Fail to User Account – The message is accepted by the server, a fault report is generated and the email message is added as a mime attachment, this is then sent on to the named account.
- Redirect to Server – Send the message on to the specified server. Often used when GMS is acting as a firewall and passes all mail on to an internal server.
- Reject the Mail – The mail message will simply be rejected and the sending server must return it to the originator of the message.
- Transfer to Account – The message is accepted by the server and transferred to the specified account without making any changes to it.
- Accept and return failure message – The message is accepted onto the server but is not delivered anywhere, rather it is discarded and a failure message generated and returned to the sender.
- Accept and quarantine message – The message is accepted onto the server and placed in the quarantine folder, no failure message is returned to the sender.
- Accept and discard message – The message is accepted onto the server but is not delivered anywhere, rather it is simply discarded. No failure message is returned to the sender.
Templates
Domain welcome message – The Domains templates page allows you to specify the content of the welcome message that is sent by default to new user accounts when they are added. Simply edit the text as required and click on the Update Settings button to apply any changes.
Accounts can be added by clicking on New User button in the Domain’s toolbar or from the users tab, where you can select not to send a welcome message at all.
Editing user settings
By selecting a user under your domain, you can edit other users information.
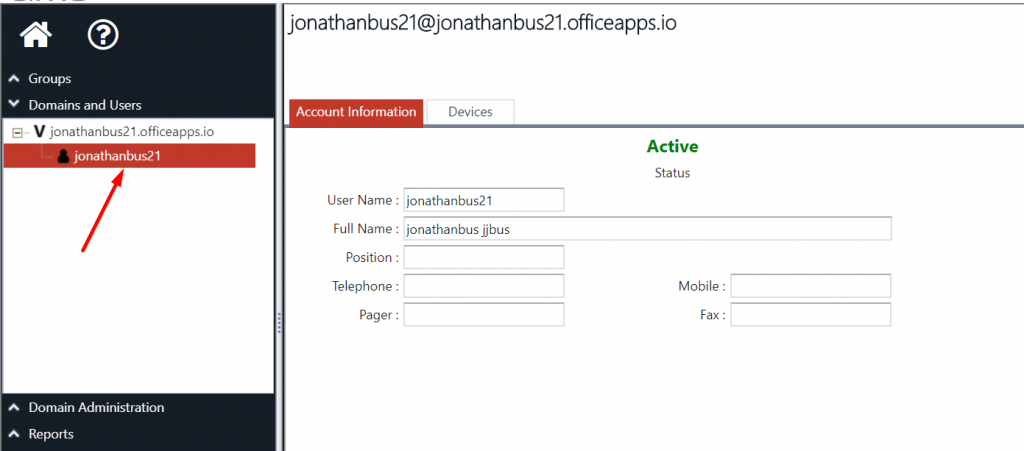
Account Information
Account Details full name – The user’s real name
Position – The user’s position or title within the organisation
Telephone – A telephone contact number for the user
Mobile – A cell phone contact number for the user
Pager – A pager contact number for the user
Fax – A pager contact number for the user
This should be all you need to get your account along with your users up and running. Once your initial set up is complete, please refer to the introduction of this document which will give you information on how to access Webspace using your new account(s).